

Hello! Happy Fall! You all know Fall is my favorite season at all time! Cool temperature, warmer lighting, sip tea (any time of the day) and best to that is I am knitting like a mad lady lately! ( Maybe that would be another post). Finally I get around to write this simple hand appliqué tutorial for you. I simply like to share what I use for the process and all the tips that I received from other master hand appliqué sewers.
So, here we go...

Here are some basic tools that I've used and felt they are a good investment for Hand Appliqué.
Freezer Paper: You can find Freezer paper in most of grocery store. It comes in a long box. One side
of the Freeze paper is coating glossy and the other side is paper finish. You'll draw on the paper finished side and adhere the glossy (plastic coating) side to the cloth with a hot dry iron.
Gutermann 100% Polyester Thread: I love how fine the thread is and very sturdy! But you can use
most type of fine thread for the hand appliqué purpose. I would avoid 100% cotton thread as I found it doesn't give clean stitch look on the appliqué pieces.
Crystal clear Ball pins: This is the best type of pins that I found and love it. It comes with two sizes.
These are fine, sharp and so easy to pin through layers of fabrics.
Applique Pins 3/4" steel: These pins are pretty thick, but short. The appliqué pin doesn't catch the hand sewing thread easily because it is short. I use maybe 3-4 pins through out the entire applique pieces.
Hera Marker Slim: This is a great investment for any type of sewing. The slim Hera Marker
comes with a sharpie point side that allows you to "tuck" the seams in and the opposite side's top comes in a small angle that can make marks on cloth easily.
Pen : More like mechanical pen. It allows to draw on the cloth easy and gets clear and accurate lines.
Appliqué Sharp Needles: Get a pack of these needles! They are probably by far the best hand
sewing needles that I've been using for years to come. I love the length and the thickness of the needles! But if you have some sewing needles around you can just use what you love!
Water Soluble Ink Pen: When you draw on cloth you want to make sure that you'll get to your project within a week or two or some of the drawing lines will fade away due the the moisture in
the air.
Scissors: A small pair of scissors that's sharp and allows to cut clean edges.
Trash Bowl: I have a few of these trash bowls on the table. When work on hand appliqué there will some small cuts to make and thread to clip. I keep them in the bowl then clean after finish.


How this work? It doesn't have a plug! You'll insert USB core into a computer (where USB is at) or a power bank. Simply touch the turn on button on the left and the light will come up. Make sure stay in a darker environment for better image showing. It is pretty thin and light weight, too!

Step 2: Place the appliqué pattern to the light pad ( I used a small piece of washi tape to held the pattern in place). Lay a piece a Freezer paper ( Big enough for the pattern) on top of the appliqué pattern. Use a pen to trace images. You'll want make sure you do a good job in tracing the pattern because these are becoming appliqué templates for each piece.

Finish Tracing Pattern on Freezer Paper

Step 3: Keep the appliqué pattern on top of light pad. Place the appliqué background cloth on top of the pattern. Use water soluble ink pen to trace images onto the cloth.


How this mini iron works? The mini iron comes with an attached plug and a little turn just below the metal part to turn the iron on. It takes 3-5 minutes to heat up the top. However, thhe whole top that made from metal is "HOT". I have burn myself a few time because had it sat so close when I work. The little rest stand gets hot as the metal top is rest on that. So, be so careful after you unplug it. Let is sat a good 10 minutes before putting it away.
I have to say this is a pretty amazing tool when it comes working with appliqué pieces, but I always ask to be leave alone when I am using it.


Step 7: Adhere the freezer paper piece to the RIGHT side of the cloth that you have planned.


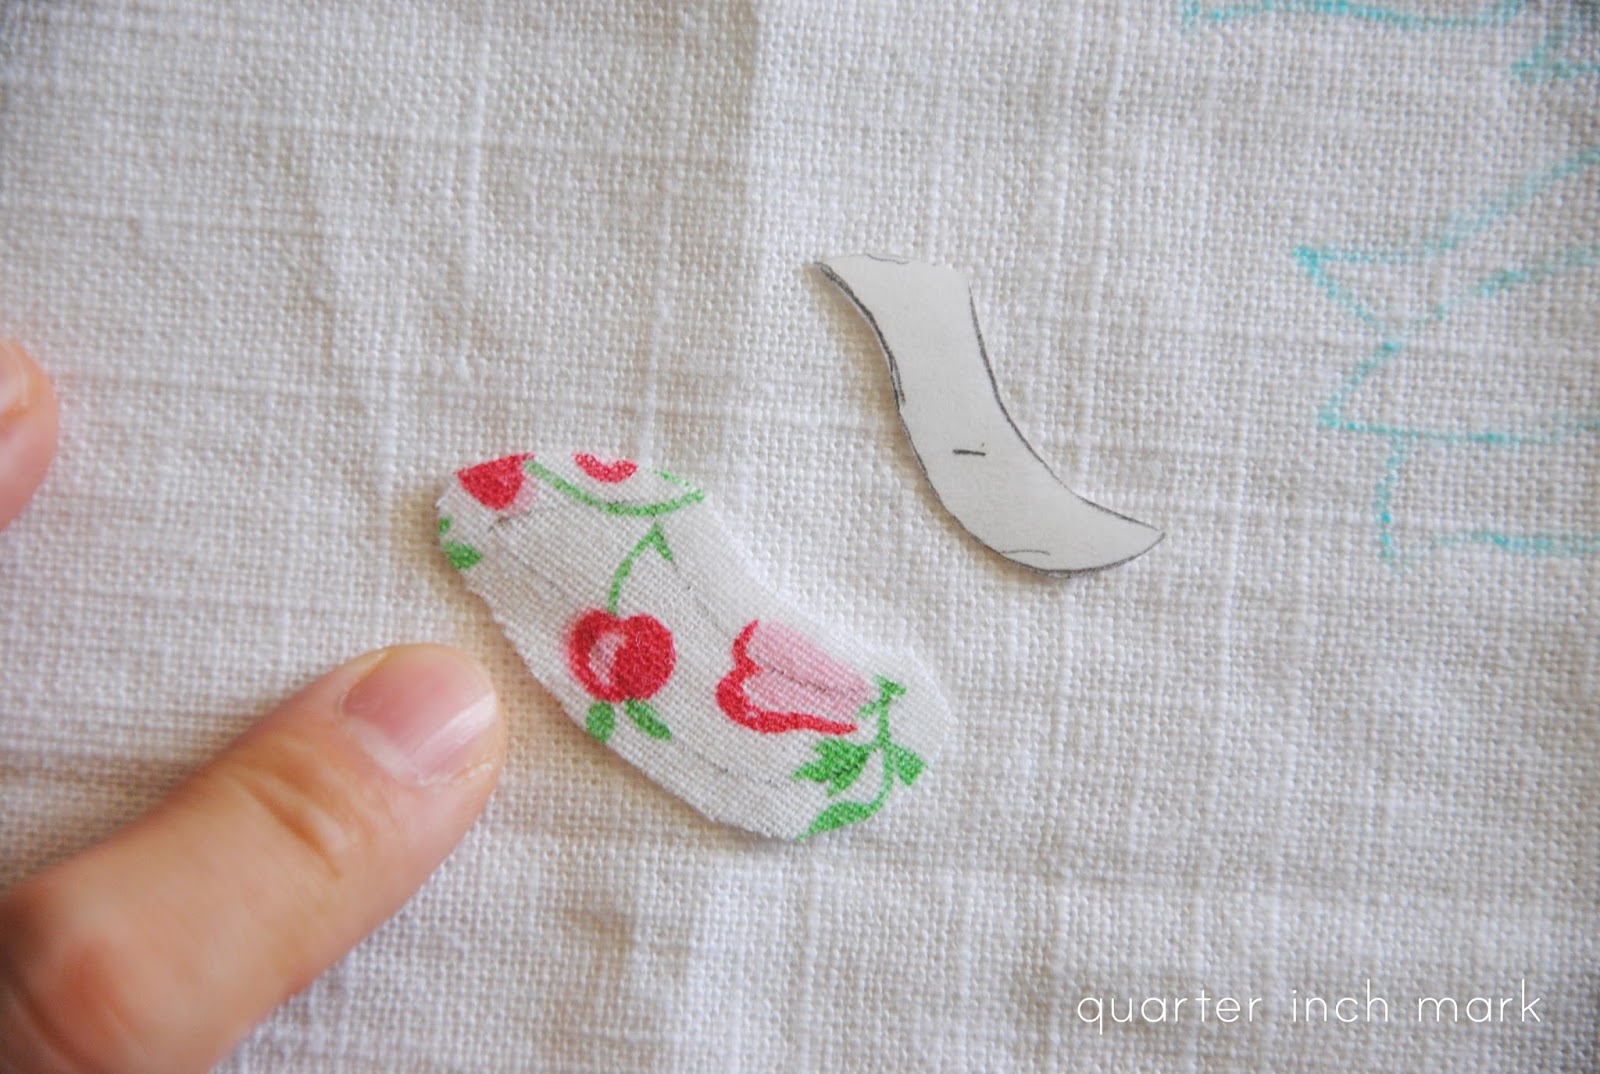


Step 28: For curvy applique piece, I've always over done with using pins. I try to match up the appliqué piece and the background lines together. I always use extra pins then take out pins as I work on.
Insert the appliqué sharp needle behind the appliqué cloth ( Step 13) then start small hand stitches around the piece. Use appliqué needle points to tuck in any seam allowance that come out and use the needle point to shape the appliqué piece as you go along the process.

Now, I'll continue to work on the piece and writing a second post on flower stems appliqué and show you more of this process along! Then a finish touch of how to frame the work. So stay turn for future post on hand appliqué. I do believe that hand appliqué is truly something more about hands and stitches making. I used to not hide out all the hand stitch threads, but now I do have more application of seeing some small thread showing and that is part of the reason I use red thread, a more promising process to myself.
Enjoy
xxc
Hi Chase! Thank you for the tutorial. What brand light pad did you purchase? Also what size is it? Thanks in advance for replying! Happy fall!
ReplyDeleteHi Chase! Thank you for the tutorial. What brand light pad did you purchase? Also what size is it? Thanks in advance for replying! Happy fall!
ReplyDeleteThank you for all of the detail you put into your applique tutorial. Well done!
ReplyDeleteThank you for this beautiful tutorial Chase! I have the exact SAME lightpad! So lightweight..and FUN! I hope I have time someday in my life to tackle a project like yours! Its gorgeous..as always!
ReplyDeletePerfect timing as this week I'll prepping a few applique pieces for a quilt that I am considering making. I like the block you chose to demonstrate.
ReplyDelete👏🏻❤️😘
ReplyDelete